
DIY Soap Making: A Comprehensive Guide for Beginners in 2026
- Odette Handley

- Feb 14
- 6 min read
DIY Soap Making: A Comprehensive Guide for Beginners in 2026
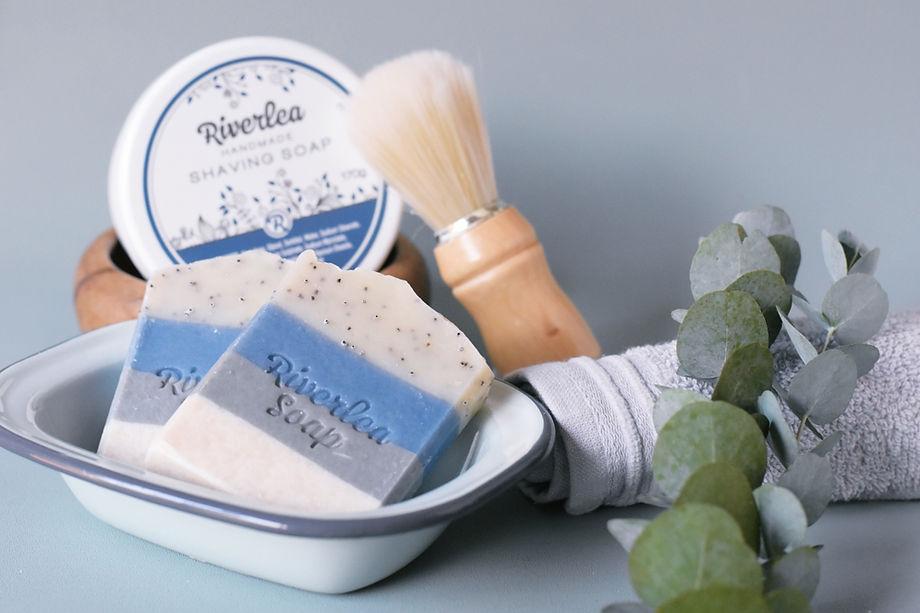
(Fun, Informative & Powered by Riverlea Soap)

1. Getting Started: Why Make Your Own Soap?
There’s something deeply satisfying about turning simple oils, lye, water, and scent into a beautiful bar of soap that you made with your own hands. Since I started making soap in 2007, I’ve loved not only the creativity but also the science behind it – watching ingredients transform through saponification into something gentle, bubbly, and skin-loving.
In 2026, DIY soap making is more popular than ever. People want:
More control over ingredients
More natural, skin-friendly options
A relaxing, creative hobby that results in usable gifts and products
This guide will walk you through DIY soap making from what you need, to equipment, oils, and all the way to packaging – with Riverlea Soap favourites highlighted along the way.
2. What You Need to Start (Basics for Beginners)
Before diving into the technical parts, here’s what you need in place:
2.1 Knowledge & Mindset
Willingness to follow instructions carefully (especially with lye)
Curiosity about ingredients and how they behave (you can't just swap one oil for another)
Patience – cold process soap needs curing time
2.2 Basic Supplies Checklist
For a simple beginner cold process batch, you’ll need:
Oils and butters (e.g. olive, coconut, sunflower, shea butter, Cocoa Butter)
Sodium hydroxide Flake (lye) – specifically for soap making
Distilled water
Fragrance or essential oils
Colourants (like micas)
Mould (silicone loaf moulds are great for beginners)
Cutting and finishing tools – e.g. soap cutter, beveller
At Riverlea Soap, you’ll find:
Soap-making fragrance oils (skin-safe, soap suitable)
Micas and colours designed for cold process soap
Cutters and bevelers for neat, professional-looking bars
A range of oils and additives ideal for handcrafted soap
3. Equipment: Setting Up Your Soap-Making Space
Think of your soap-making area as a mini lab mixed with a creative studio. Safety and organisation come first.
3.1 Essential Equipment
Digital scale – accurate measuring is non-negotiable
Heatproof jugs – one for lye solution, one for oils
Stainless steel or heavy plastic mixing bowls
Stick blender – speeds up the process and brings the batter to trace
Thermometer – to check oil and lye temperatures
Silicone spatulas – for scraping and swirling
Silicone or lined moulds – loaf, slab or individual bar moulds
Riverlea Soap cutters – for consistent bar sizes
Riverlea Soap beveller – to smooth edges and add that professional finish
3.2 Safety Gear
Safety goggles
Long gloves (that cover wrists)
Long sleeves and closed shoes
Protective surface (old towels, newspaper, or dedicated mats)
Vinegar (for neutralising accidental lye spills on surfaces)
Keep all equipment used for soap making separate from food equipment.

4. Oils & Ingredients: Building Your Perfect Bar
This is where the fun (and science) really starts. Different oils bring different properties: hardness, lather, conditioning, and longevity.
4.1 Common Soap-Making Oils
Olive oil – gentle, conditioning, great for sensitive skin
Coconut oil – cleansing, bubbly lather (use in moderation for gentleness)
Sunflower or canola oil – affordable, conditioning
Shea butter or cocoa butter – hardness, creaminess, luxury feel
Castor oil – boosts lather in small amounts
At Riverlea Soap, you’ll find a range of high-quality oils and butters perfect for formulating your base recipe.
4.2 Fragrance Oils: Scenting Your Creations
Scent is one of the most memorable parts of a bar of soap.
Riverlea Soap offers soap-safe fragrance oils in a wide variety of profiles:
Fresh & clean (great for everyday family bars)
Floral & romantic
Fruity & fun (perfect for kids’ soaps and gifts)
Warm & spicy (ideal for winter or cozy, rustic bars)
Tips for beginners:
Start with one fragrance oil per batch until you understand how it behaves.
Note any acceleration or discolouration in a soaping journal.
4.3 Colours & Micas: Making Your Soap Pop
Colour can completely transform a simple recipe.
Riverlea Soap stocks vibrant micas and colours formulated for soap making:
Use a single mica for clean, bold colour.
Try layers or simple in-the-pot swirls for your first designs.
Mix mica with a little oil from your batch before adding to avoid clumps.
Colour ideas:
Soft pastels for calming spa-like bars
Bright, bold colours for kids or gift sets
Earthy tones with greens, browns, and creams for “natural” and rustic bars
4.4 Additives (Optional but Fun)
Clays (for slip and gentle cleansing)
Oatmeal (for mild exfoliation)
Botanicals (dried petals, herbs – used carefully to avoid browning)
5. Safety First: Working with Lye Confidently
Soap cannot be made without lye, but it doesn’t remain in the finished bar – it reacts completely with oils to create soap and glycerine.
5.1 Essential Lye Safety Rules
Always add lye to water, never water to lye
Mix in a well-ventilated area
Wear goggles and gloves at all times when working with lye solution
Keep pets and children away from your workspace
Clearly label your lye container and store it safely
If lye splashes on your skin:
Rinse immediately with cool running water
Do not try to neutralise directly on skin with vinegar – water is best
6. The Soap-Making Process: From Oils to Bars
There are several ways to make soap, but for beginners, cold process and melt-and-pour are the most common.
6.1 Cold Process Soap – Step-by-Step
Prepare your workspace
Put on safety gear
Lay out all ingredients and equipment
Line or prepare your mould
Measure oils and butters
Weigh each oil/butter carefully according to your recipe
Melt solid oils/butters gently and combine with liquid oils
Make your lye solution
Weigh distilled water into a heatproof jug
Slowly add weighed lye to the water (never the other way round) while stirring
Let solution cool
Bring oils and lye solution to similar temperatures
Typically between 35–45°C for beginners
Mix lye solution into oils
Pour lye solution through a strainer into oils to catch any undissolved bits
Use a stick blender in short bursts, alternating with hand stirring
Blend until “trace” – the batter thickens slightly and leaves a light trail on the surface
Add fragrance and colour
Mix in Riverlea Soap fragrance oils
Stir in pre-dispersed Riverlea micas for colour
Pour into moulds
Tap gently to release air bubbles
Swirl the top with a spatula if you want a decorative finish
Insulate and saponify
Cover and insulate (towel or box) if needed
Leave for 24–48 hours until firm enough to unmould
Cut and bevel
Use a Riverlea Soap cutter for even bars
Use the beveller to smooth edges for a professional, comfortable feel in the hand
Stamp using a custom made stamp
Cure
Place bars on a rack in a cool, dry place with good airflow
Cure for 4–6 weeks to harden and mellow the bar
6.2 Melt-and-Pour (Quick & Easy Option)
For those who want to skip lye handling:
Buy a melt-and-pour base
Melt gently in a double boiler or microwave
Add Riverlea fragrance oils and micas
Pour into moulds and let set
Unmould, trim with a small cutter if needed, and package
No curing time is required – they’re ready as soon as they’ve fully hardened.
7. From Slab to Shop-Ready: Cutting & Finishing
The way you cut and finish your soap makes a huge difference to how it feels and looks.
7.1 Cutting
Cut when the loaf is firm but not rock hard
Use a straight cutter for classic bars
Use a wavy cutter for decorative, rustic edges
Aim for consistent bar sizes – this looks better and is easier if you sell or gift sets
Riverlea Soap cutters are designed to help you achieve neat, even cuts every time.
7.2 Bevelling
Bevelling means trimming off the sharp edges of the bar:
It makes the soap more comfortable to hold and use
Gives a polished, professional finish
A Riverlea Soap beveller makes this quick and satisfying – one smooth pull and the edge is perfectly softened.

8. Packaging: Making Your Soap Gift-Ready
Thoughtful packaging does two jobs: it protects your soap and tells its story.
8.1 Functional Packaging Ideas
Paper bands or cigar bands around the middle of the bar
Kraft boxes with cut-out windows
Tissue paper wraps tied with string or raffia
Include on your labels:
Soap name and scent (e.g. “Midlands Meadow – Lavender & Lemongrass”)
Basic ingredient list
Weight
Brand name and website: Riverlea Soap / riverleasoap.com
8.2 Aesthetic Touches
Coordinate packaging colours with your soap micas
Add a small stamp or sticker of your logo
Use simple, nature-inspired designs to echo your natural ingredients
If you’re gifting:
Bundle a set of different coloured, fragranced soaps together
Finish with a tag explaining it’s handmade, cold process soap made with care
9. Bringing It All Together (and Your Next Step)
DIY soap making in 2026 is about creativity, self-care, science, and sustainability. With the right equipment, thoughtful oil choices, beautiful fragrance oils and micas, and finishing tools like cutters and bevellers, you can create bars that look and feel like they’ve come from a boutique – because they have: your own.
If you’re ready to start:
Explore Riverlea Soap’s fragrance oils, colours/micas, and soap-making tools
Choose a simple beginner recipe
Set up your workspace, take your time, and enjoy the process
Author Bio
Odette – Founder & Soap Maker at Riverlea Soap
Odette has been making soap since 2007 and is passionate about combining creativity with the science of formulating beautiful, skin-loving bars. From her base in the KwaZulu-Natal Midlands, South Africa, she develops artisanal soaps, ingredients, and tools that help others discover the joy of DIY soap making.


Comments