
Make your own Silicone mould liner
- Odette Handley

- Jun 21, 2019
- 3 min read
This has been such a popular post we decided to add it to the new blog .
I have wanted silicone liners for my wooden moulds for a very long time as I am so sick of lining them with paper or plastic. No mater how easy it is to line them it still takes time! The only problem is you have to make a box that just fits into your mould leaving a 0.5-0.8cm space around the box so you can pour the silicone in. See this link from Amanda Griffen on how to make a mould. It is an eBook but looks really good. This is a real problem for me as I have quite a few different mould sizes and really did not want to make loads of boxes to fit. Too much work and then wasted wood when I was finished. I had to come up with a clever plan. And I think I did. I hope it helps all you you out there. It takes a little longer to do than the box in a box method. We will make the sides first then make the base afterwards.
You will need
Some Silicone to mix up. I used Mould Max 30 from AMT Composites.
A stick to stir it
A small stick like a skewer to fill in the sides
Metal clips/ grips


Make sure you have made the box/ sides that you will pour the silicone into. I used a huge tile and wood clamped together. Measure your moulds to make sure that you make the box the correct size. i.e. if your mould length is 60x10x10 high and you only make the box 50cm it will not be long enough for the longest side.
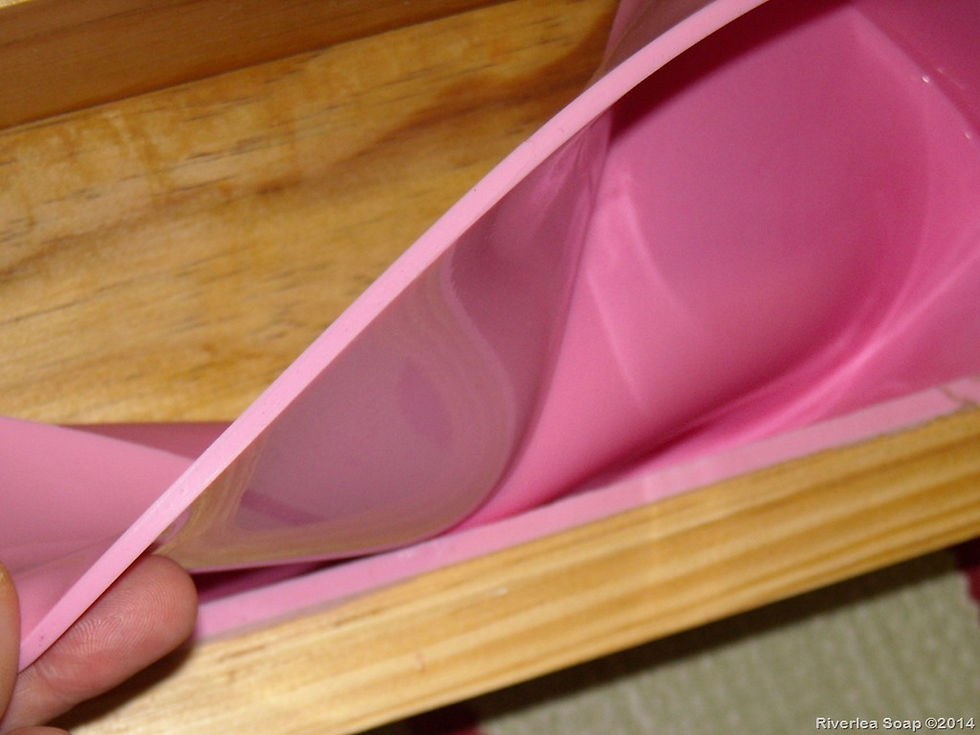
1 Mix the silicone as per the manufacturers instructions2 Have your little sticks ready (this will be when you make/ pour the base which is coming later3 Pour the silicone into the large box you have created and leave it to set, Usually 12-24 hours4 Once the silicone has set measure and cut the silicone to fit into the sides of your mould as per pic 75 Place your mould on a flat, level surface6 Fill all the cracks with putty to make sure the silicone does not leak out7 Secure the cut pieces onto your mould - I used metal clips/ grips8 Once all the sides and ends are cut and secure mix up a new batch of silicone, enough to fill the base of the mould. I made all my sides and base .6cm thick. Take your little stick and get a blob of silicone, slide it along the sides/ corners where the two pieces of silicone meet making sure there is enough to stick the sides to each other but not too much that it runs down and pools the the base. Work quickly as your silicone is setting up. See the picture below of the corner9 Pour the silicone into the base of the mould making sure the it is evenly distributed and has no bubbles10 I used a stick to spread it and make sure it went into the corners11 Go back to the corners and if you need to re apply more silicone do it now while the silicone is still fluid12 Wait for the silicone to set up and you can pull it out of the mould. It will be a perfect fit when you put it back.
If the corners are not adequately stuck then the next time you mix silicone just reapply to the corners.
This is not as neat and perfect as the box method but I prefer it (because I came up with the idea ha ha) because it saves me having to make the boxes to fit inside the moulds which would take time and money.


That is it - easy peesy. I have now done all my moulds and I will never have to line them again - YAY! I hope this makes sense and helps you all out there.


Comments